Your first playable build. One clear step at a time.
Choose your engine, then follow preparation through a game you have launched and checked.
Guide progress only. You confirm the checks; this website does not scan your computer or verify builds.
Watch the setup recordingStep 1 of 8
Prepare your project and computer
Use the engine and version named by the project.
Have a working game project on a Windows x64 computer. Choose its engine so the requirements match your project. Keep a backup and enough disk space for an isolated source snapshot and the resulting build.
What you should see
You know the engine and project version, have access to the source, and can identify the Windows target you want to build.
If something does not match
If the engine or version is unclear, inspect project.godot, Unity ProjectVersion.txt, or the .uproject metadata. Do not upgrade the project just to match a tool already installed.
Open the recovery guideInstall and sign in
Use the download supplied through your verified frameDock account. Launch the Windows application, then approve its email sign-in request using the matching code. Microsoft WebView2 is required. Public sign-up is currently closed; existing access and the guide can still be reviewed.
What you should see
The application opens into your local workspace and the approved computer is associated with the correct account.
If something does not match
Check the address and matching device code, request a new link if it expired, and confirm WebView2 is installed. The current pilot is unsigned; signed-installer and clean-machine installation remain release gates.
Open the recovery guideOpen the game project
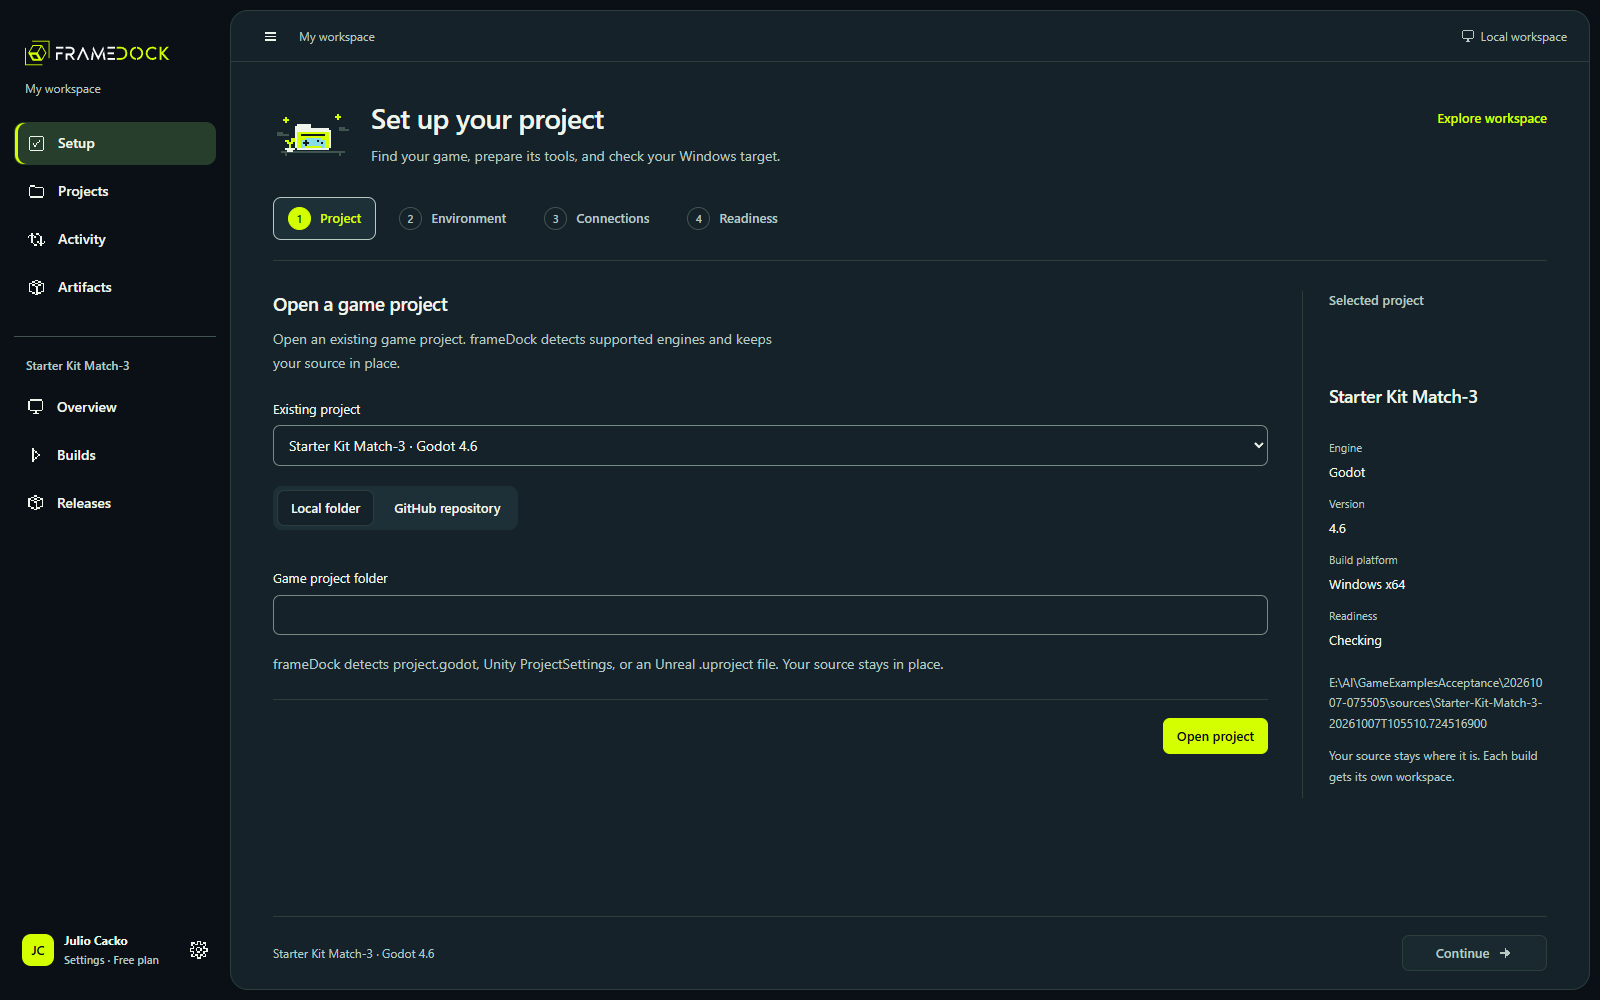
Choose Open project, or use Setup → Project. Select your local folder or an authorized GitHub repository. For the shortest first-build path, use a local project; GitHub authorization is optional.
What you should see
The project overview shows the correct engine and version. Project source is detected, and the source remains in its original location.
If something does not match
Select the folder containing the engine’s project file, not a parent workspace or a built-game executable. For a repository, confirm the correct subfolder and that your GitHub account can read it.
Open the recovery guideResolve the Windows environment
Open Setup → Environment. Reuse a compatible detected installation or select the correct executable. Review required templates, modules, license and toolchain. Approve any vendor installation or license action explicitly.
Requirements for your engine
- Choose your engine in the preparation step to see its requirements.
The four stages of project setup
Follow Project, Environment, optional Connections and Readiness in the current interface.
Current interface · Recorded 9 October 2026 · Existing October 7 build records
Read the walkthrough
- Choose an existing game project without moving its source.
- Environment checks the matching editor, Windows target and export requirements.
- Connections are optional for a local build; provider authorization and publishing configuration are separate.
- Readiness reports required checks. A passing setup check is permission to build, not proof that the game plays.
What you should see
Required environment rows report verified checks for the selected project and Windows target. An installed editor alone does not satisfy every build requirement.
If something does not match
Read the failing requirement. Recheck after resolving it; do not reinstall unrelated tools. Godot needs matching templates, Unity needs its exact editor/modules and license, and Unreal needs compatible C++ tools and the Windows SDK.
Open the recovery guideConnect publishing services only if needed
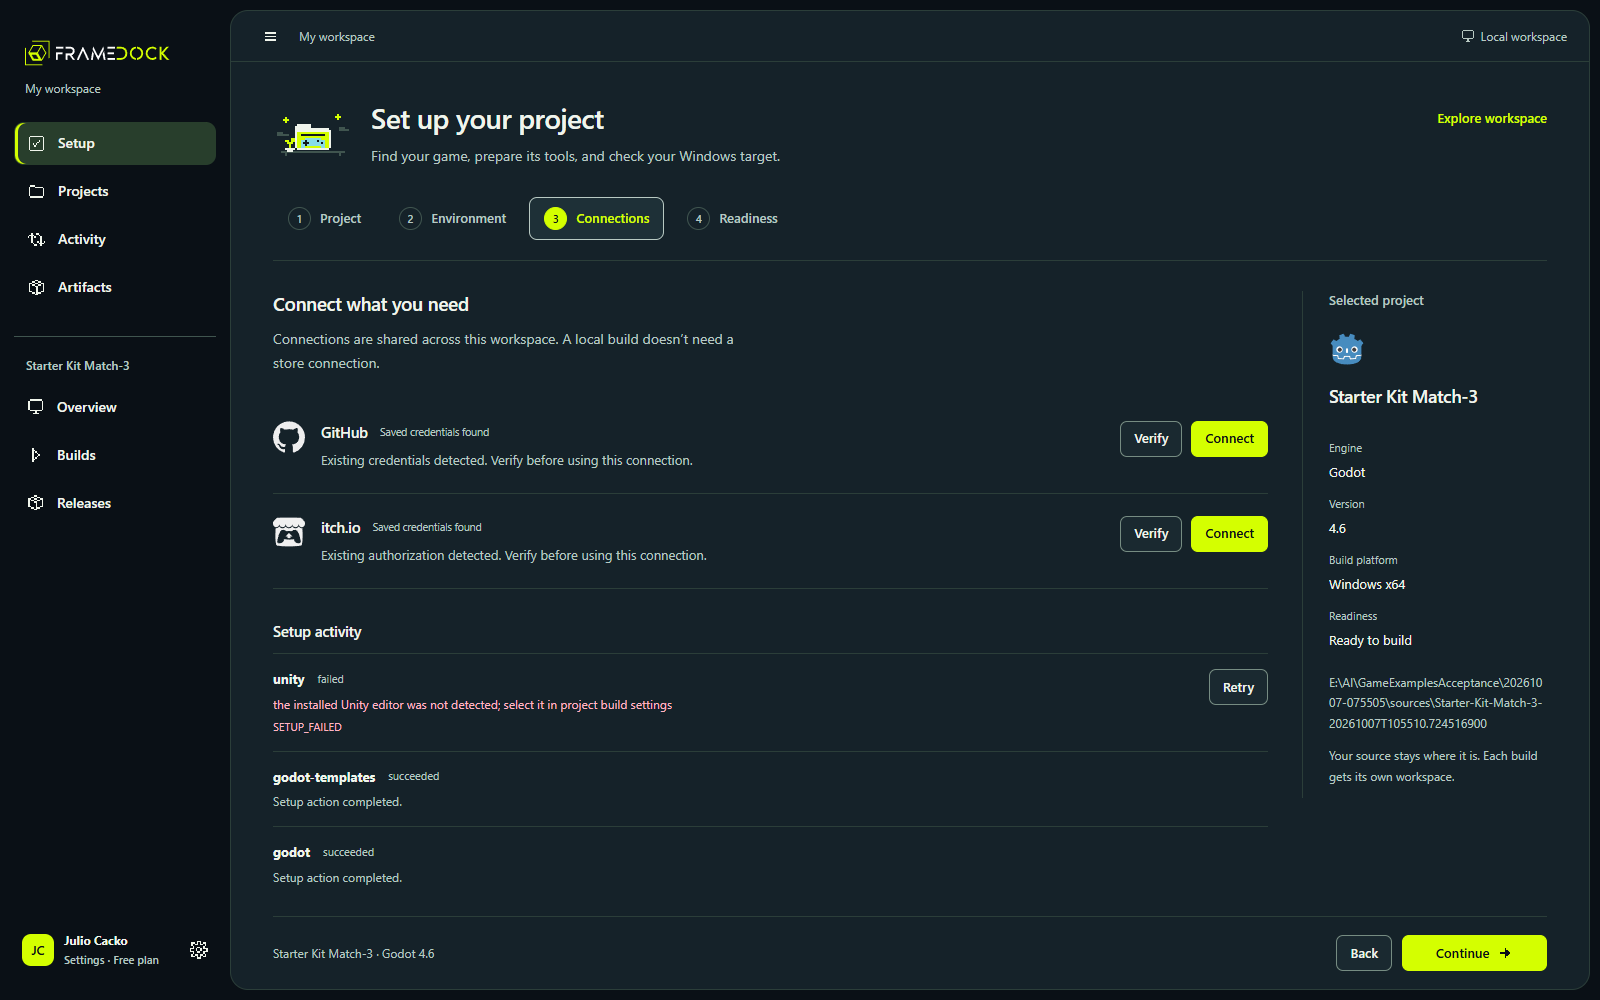
A local build does not require a store account. If you want source access or publishing, use Connected accounts for GitHub, itch.io or Unity, then Project settings → Publishing for the destination. Discord delivery notifications are optional.
What you should see
Only the services you intend to use are configured. Detected credentials, verified account access and a complete publisher destination remain separate states.
A store connection is optional.
Continue without connections for your first local build. Add them later when you actually need source access or publishing.
If something does not match
Confirm the provider account and its project permissions. A generic sign-in is not a Steamworks publisher grant. Use a private Steam branch and valid app/depot mapping; keep credentials out of screenshots and logs.
Open the recovery guideRun the final readiness checks
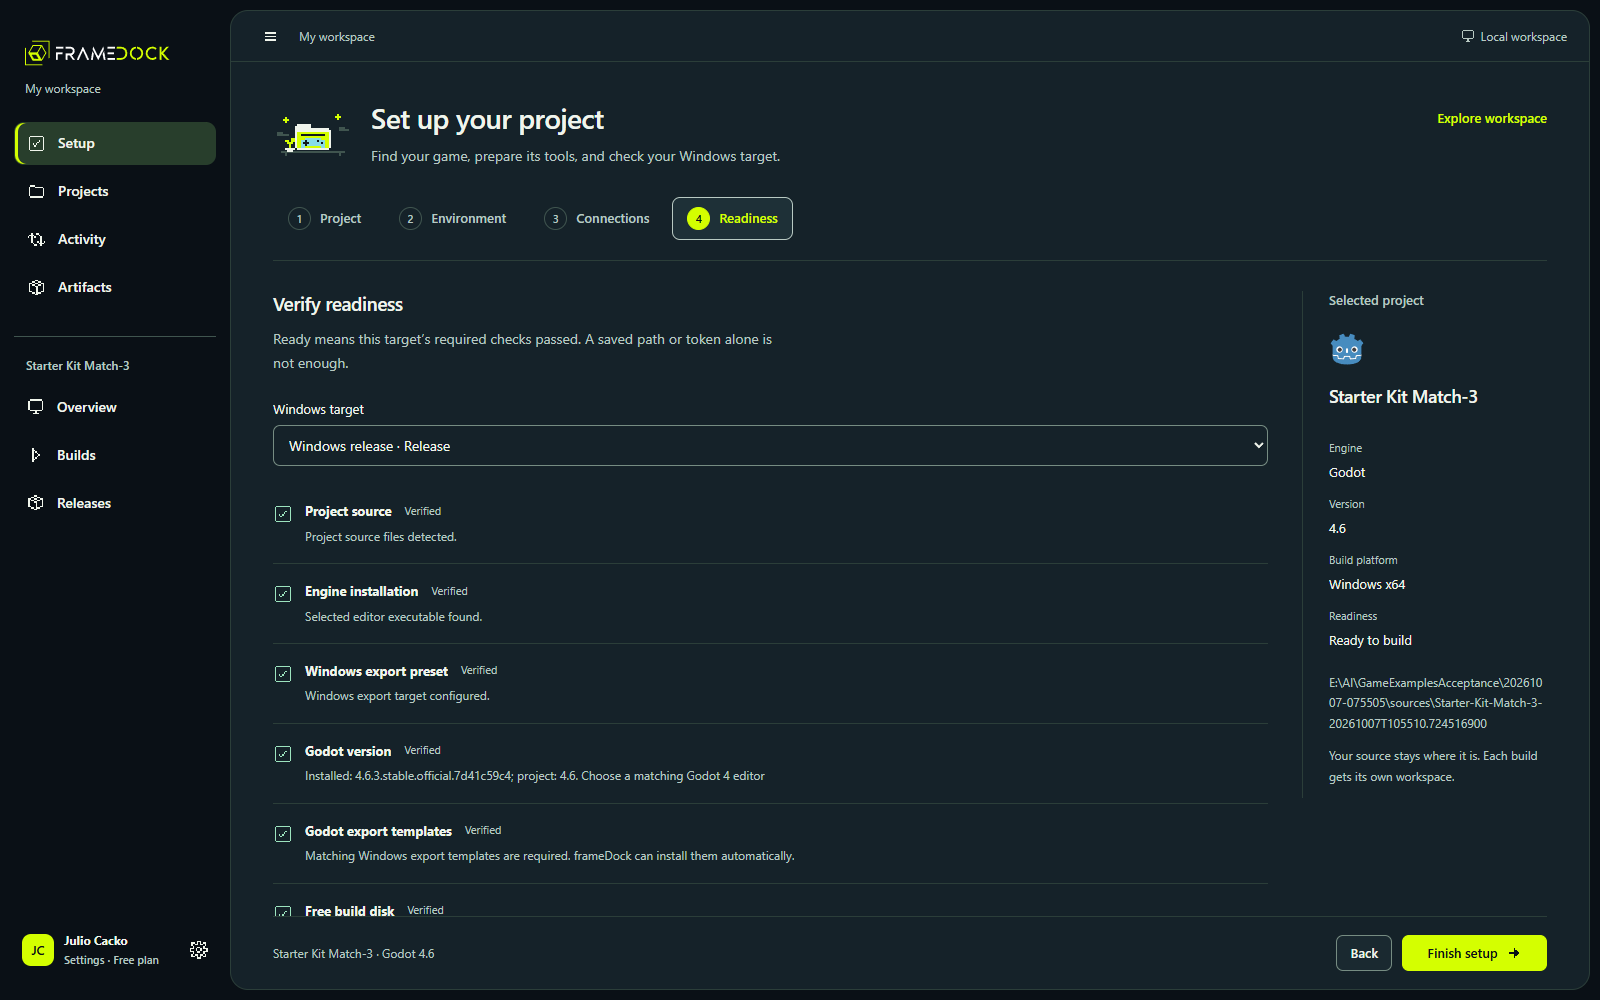
Open Setup → Readiness and recheck the selected Windows target. Finish requires the required checks to pass. Then return to the project overview.
What you should see
The app reports Ready to build or Setup checks passed for the selected target. Optional publishing connections do not block a local build.
If something does not match
Return to the failing stage, resolve that specific requirement and recheck. Canceled or interrupted setup operations retain recovery/retry actions; a saved completion flag is not a substitute for current checks.
Open the recovery guideRun and inspect a Windows build
From the project overview choose New build, select the Windows target/configuration, and start the build. Follow the queue, diagnostics and raw engine log. Wait for completion before inspecting the produced artifact.
Run a real Windows build
Start a Godot Windows release in the current interface and follow its completed artifact.
Current interface · A new Godot Windows release recorded 9 October 2026 · Gameplay not tested
Read the walkthrough
- Open the existing Godot project after its required setup checks pass.
- Choose New build, keep the Windows release target, and start the actual run.
- Follow the real build while the production build service exports and archives the game.
- Inspect the new completed artifact. Gameplay is not tested in this recording.
What you should see
A completed run has a Windows archive and file manifest. The example clip starts a real Godot build; your own project and run must succeed independently.
If something does not match
Open the original log, identify the first actionable error, resolve it and retry. Cancel when necessary. An interrupted run can recover on restart; a canceled run does not establish a usable artifact.
Open the recovery guideCheck the files and play the game
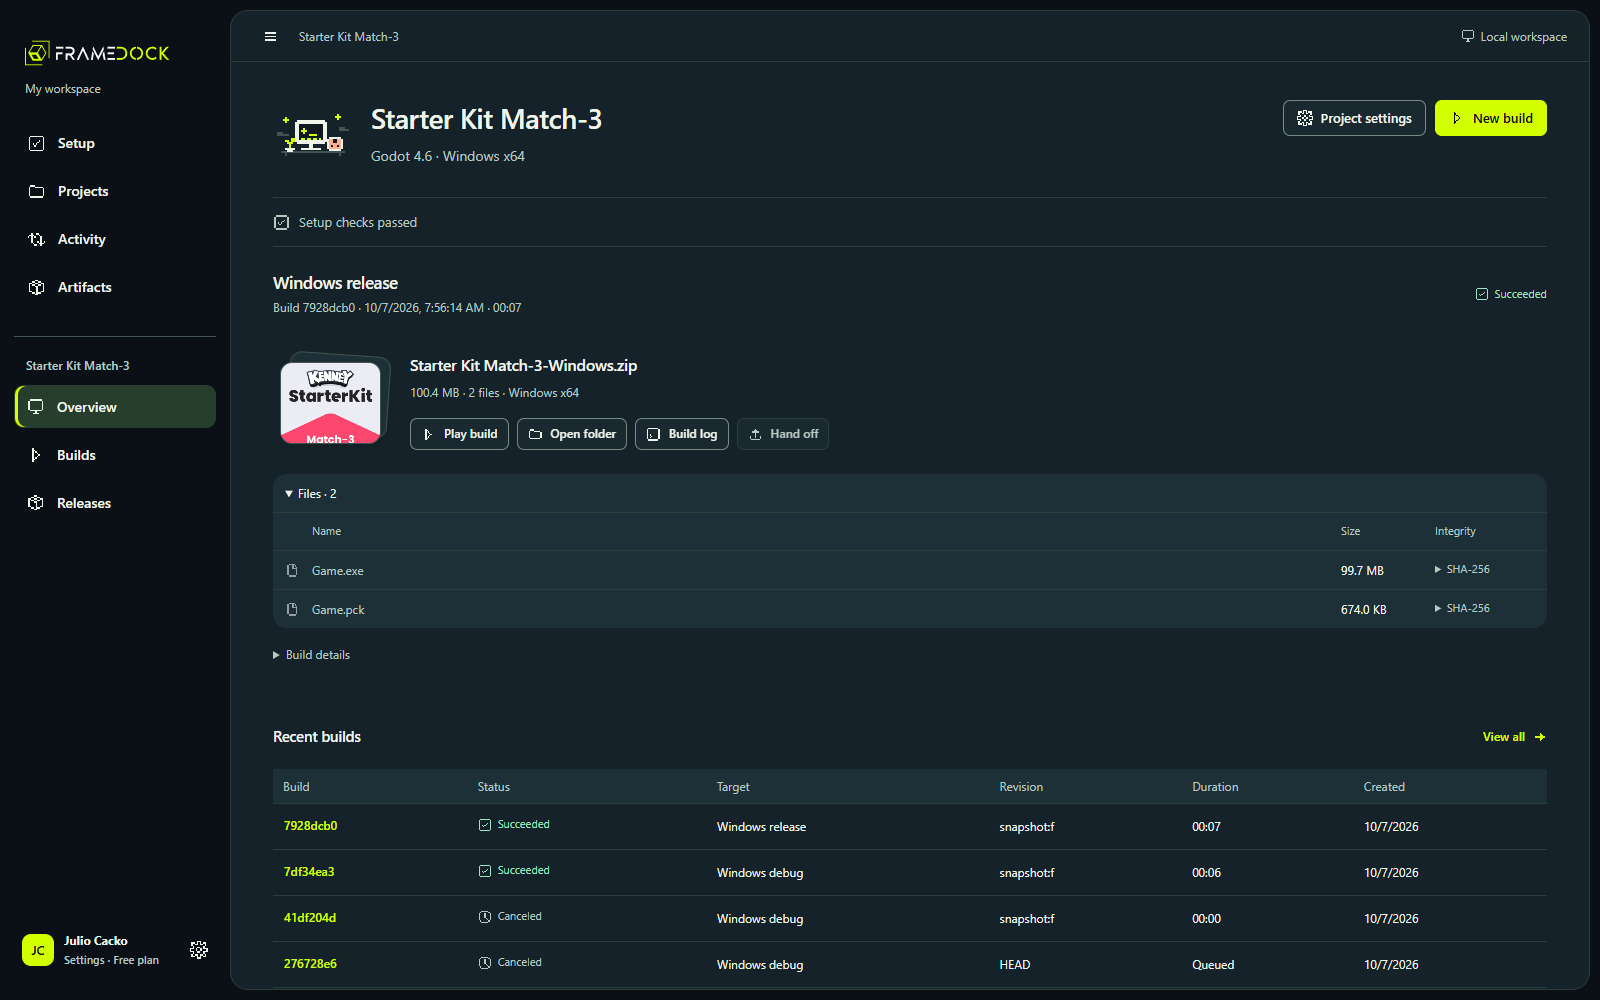
Inspect the ZIP’s listed files and SHA-256 values, extract it into a fresh folder, and launch the game. Check its entry screen, input and the main behavior that matters for your project. Keep the build configuration and log with the artifact.
What you should see
The extracted files match the manifest and the actual game launches and responds. This is your first meaningful result—not merely installation or a green build status.
If something does not match
If the game fails to launch, verify missing files, engine runtime dependencies and configuration. If gameplay is wrong, fix and rebuild the project. File integrity does not certify gameplay or store acceptance.
Open the recovery guide